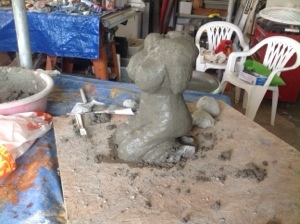
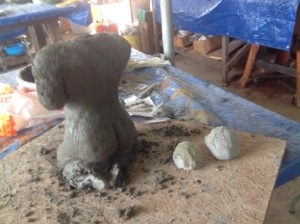
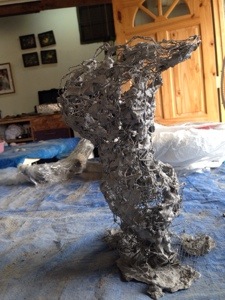
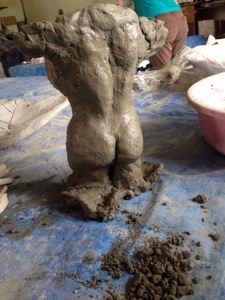
Well, after learning how to properly mix the cement, what proportions of sand cement and fiber to use, I’m beginning to get the hang of it. I’ve made a beautiful birdbath from a giant leaf I got on my property up in Jaramillo, and I made a bowl using a stainless steel bowl as a form and placing small leaves in the cement to create a leaf pattern. I also made the stand for my birdbath . Yesterday we learned about staining the cement. Chris (the instructor) gave us notes on all the formulas for the tints and dies, thankfully because he already had all the colors all mixed up and Geesh! The guy is like a mad scientist when he’s working and not especially great at teaching how to actually do what he’s doing. I can totally relate to how hard it is to teach, It’s near impossible for me to teach someone how to do a haircut! I don’t really have the words to describe to someone in great detail , exactly what to do, I have to just do it and show someone. Chris is much like that when he’s trying to teach what he already has in his head. It’s all just such second nature to him and I notice he’s best at showing rather than talking. He has provided us with some great notes on all the formulas and all the important procedures for working with concrete. So, as I said, we colored our pieces yesterday and I had a great time watching all the other students pieces come to life as they painted the different colors onto them. We really have a great group of people in our class, which to me has made this experience even more fun! You know how much I love making new friends and I met some great people as well as got to know someone I already knew. Everyone ended up making some great pieces, all very different and all just beautiful! I’m going back today to finish up a few things. I also started trying to create a figure, which was my whole goal in taking this class. I was really hoping to learn how to do my figurative work that I love so much. The torso that I started is not looking so good! Yikes! It seems as though working with cement is not quite as forgiving and its not the same immediate gratification that you get when working with clay. I just hate that I have to work in layers and wait till the next day to add any detail! I’ll work on it some more today and see where it goes. I suspect I just need to get used to this new medium. Another thing that’s not so great about working with cement is “Ouch!” it’s terrible on your hands!! Sheesh! I’m all cut up from bending the chicken wire and my poor fingers have areas with no skin from the lime in the cement drying it out so badly!! Yesterday I experimented with working with my latex gloves that I have for doing my hair color and that seems to have really worked pretty well! I can buy them at Price Mart in bulk and they aren’t too expensive so as they tear I can just dispose of them and get new ones. I’m going to keep trying to acclimate myself with using cement and I may even set up a little space here at the house, under the carport to work on making a few things. It’s really nice that you don’t need a kiln and the pieces just dry up on their own. There are so many cool possibilities, I’m psyched to explore what I can do and what I can create with this new (to me) medium. I just hope my poor hands will forgive me, Yikes! Latex gloves are my new best friend!
Tag Archives: concrete
Someone Has A New Hobby….
Day two of my cement art workshop and I’m hooked!! On the first day we learned all about cement mortar and concrete and how to properly mix it to make different figures and pieces of art. We’ve been mixing a mortar like consistency with sand cement and a little fiber and water. We practiced by making our first project which was a bowl. We simply used a stainless steel bowl placed upside down on the table and added moist sand around the lip to hide that part of the bowl and create a wide rim on our bowl. Then we covered the bowl with wax paper to assure that the cement will easily release from the bowl. We also walked around the yard and collected cool looking little leaves and placed them on the bowl over the wax paper and before adding the concrete which will give a pretty leaf pattern inside the finished piece. Another option , in place of the wax paper some used plastic wrap which gave the piece a shiny surface after it dried. I decided to scrunch up my wax paper and this gave a wonderful texture after it dried. Then we added the mortar and completely covered the bowl and the sand around the lip. I then added more leaves on the cement to give the outside of the bowl the same leaf pattern. We used a trowel to flatten the very bottom of the bowl giving it a level base so it sits nicely. Then we covered it with plastic wrap and let it dry over night. This morning , first thing we unwrapped our bowls and removed all the wax paper and leaves and used a file to smooth out any rough, pokey edges. Then rinsed it off and put a little water inside the bowl, wrapped it in a plastic bag and put it away to finish slowly drying. If it dries too fast it may crack so keeping it a little moist is important. I just love my bowl, its very organic looking, which I love. The next step will be learning to tint and die and all that good stuff. It will be very interesting to learn about all the different dies and tints and chemicals to use to create color on concrete.
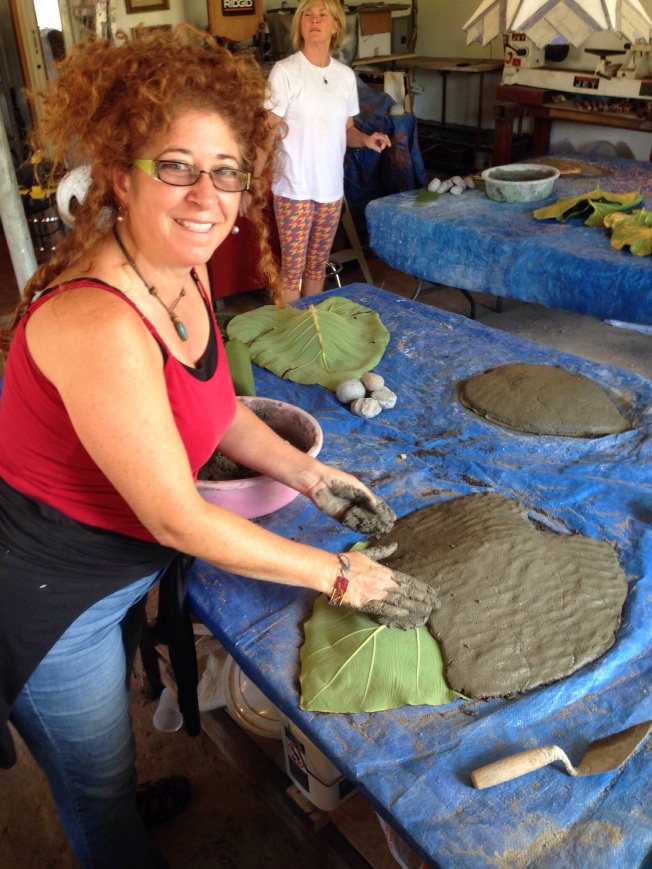
Day two (today) we learned about sand casting. We were told to bring a big leaf with us to class. I went up to our property and got some huge leaves to bring. I decided to use one of my giant leaves to make a birdbath. First we placed damp sand down on the surface about the same size as the leaf, the leaf then goes on top of this small form and then on top of the leaf is the mortar. He instructed me to make it about 2-21/2 inches thick and to make the edges a little flatter so the birds would have a place to sit while they drink. This will dry tonight, we shall see tomorrow what happens with that. I also made the base of the birdbath by rolling up some wire mesh and covering it with a scratch coat of mortar to be added to tomorrow. I cant wait to finish this piece. My mind is just racing, thinking about all the different possibilities! One thing I’d really like to consider trying is making concrete countertops for our casita! The most important part will be learning where we can buy all the chemicals for tinting and adding color. Here’s a few photos of the progress so far….. Read the rest of this entry
Progress Report!
The countdown to our move is marching onward ! Time is truly flying by faster than I can believe! There’s only 115 days until February 1! We have loosely set February/March as our goal to list the house for sale and I must admit that seems awfully quick! Scott is making great progress on all the finish work in the house.
